- Index
- Homebrew Releases
- Homebrew Projects
- References
- Tutorials
- Useful Source
- Libraries
- About ObeyBrew
- Contact ObeyBrew


|
Search ObeyBrew.Com |
OBEYBREW.COM | Tutorials | A Crash Course In HuC Part 1
A Crash Course In HuC
Part 1 - Hello, PCE World!
Virtually all introductory programming texts start with a 'hello world' example, so why break tradition now? But unlike many other programming texts that bore the hell out of you from the start with useless theory, we're going to jump straight into programming useful things from the very first lesson. Since this is the first lesson, I'm going to keep it rather simple: we'll be making a very simple ROM image that will run in any emulator.What You'll Learn
In this lesson, you'll learn how to set up a HuC program and how to put some text on the screen.The First Step
Create a new file and save it as hello.c. Make sure this file is saved as plain text... as much as some word processors make some very pretty text, the compiler won't be able to understand the special formatting that they use so make sure you do not format the text in any way. That means no colors, no font changes, no bold, no justify, no tables, or any of that kind of fancy stuff... just good old text.Writing Our Program
The two most important pieces of the puzzle. The very first step in our program is what is called an inclusion, or more commonly, just called an include. This simply means we're going to include something else into our program. In this case, we are going to include the HuC header, huc.h.#include "huc.h"
The other critical part of every program you write is what is called the main function. The main function is where your program starts. Clever name, huh?
main()
{
Making Something Happen
What we have so far isn't very impressive... in fact it doesn't really do anything we can see. So, let's make our machine do some work we can see!set_color_rgb(1, 7, 7, 7);
Let's make note of the values themselves. set_color_rgb takes four pieces of data, called arguments (no, functions do not argue with each other and I have no idea why they called them this... 'parameters' would be a better phrase, right?). This function alters a color in the palette. There are 512 color indexes on this hardware; the details of this are covered later as well as in the normal reference. Anyways, we're telling the hardware 'hey we're going to change color 1'. The next arguments are the pieces of data that determine the actual color. If you remember from art class, color is made up of three primary colors: red, blue, and yellow. However, the rules are slightly different when it comes to light: all colors in regards to light are made up of red, blue, and green. Furthermore in color terms, the more pigment you use, the darker the color. In light the opposite is true: the more light you use, the brighter the light. In our case here, we can use values between 0 and 7 for each of the three primary colors: red, green, and blue. When mixed together, evenly we get a grey. When we use all 7s, we get pure white. If you've grasped this stuff, then the rest will be easy.
set_font_color(1, 0);
set_font_pal(0);
load_default_font();
Everything we've set up so far will show once we use our final function of this lesson...
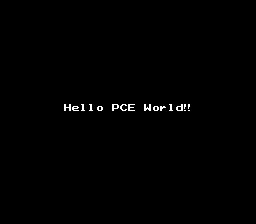
put_string("Hello PCE World!", 8, 13);
}
Compiling And Running Our Program
Before you do anything else, save your work!The usual method of compiling is to type huc hello.c on the commandline or by dropping hello,c on top of huc.exe in Explorer. If all goes according to our diabolical plans, what you end up with is a file called hello.pce. This is an executable ROM image that an emulator can understand.
So... What's Next?
This lesson has covered a great deal of material in a very short time. You should now understand the basic essentials for writing a HuC program: the header file, the importance of the main function, how functions are called, how arguments are used, and how to write a simple function. But we've only barely scratched the surface. The next lesson will cover more text writing functions and introduce you to the wonderful *cough* world of variables.Full Program Listing
#include "huc.h"

main()
{
	set_color_rgb(1, 7, 7, 7);
	set_font_color(1, 0);
	set_font_pal(0);
	load_default_font();
	put_string("Hello, PCE World!", 8, 13);
}
Sample Output